
The lucky first bread to be attempted was focaccia. So chosen because of this line in my Ottolenghi cookbook “If you’re new to making bread then focaccia is a great place to start”. One of the many things I discovered during this process was “a great place to start” should not be misconstrued as a euphemism for “super quick and easy”. Also, partly chosen because of this great sketch which means I always think of it as focachiachia.
The focaccia, as outlined by (HRH) Yotam Ottolenghi, requires three separate rises. The first is two hours and the next two are each one hour. For those playing at home that means that, if you have weirdly decided to bank on the focaccia being successful for your dinner, you definitely shouldn’t start it after 5pm. We live and learn.
Earlier today, when describing this (basically non-existent) blog to a friend, I realised that one of my challenges is going to be the way I approach recipes. Most food bloggers seem to look at recipes and modify them, taste-untasted, due to their general understanding of recipe things. When it comes to baking, however, I tend to be a vitriolic recipe follower. This lack of adventurousness means I will probably just be reproducing other people’s recipes verbatim, which I presume that is less interesting to read? I might be wrong. What I didn’t count on was that my first challenge would also prompt me to improvise on the ingredients front.
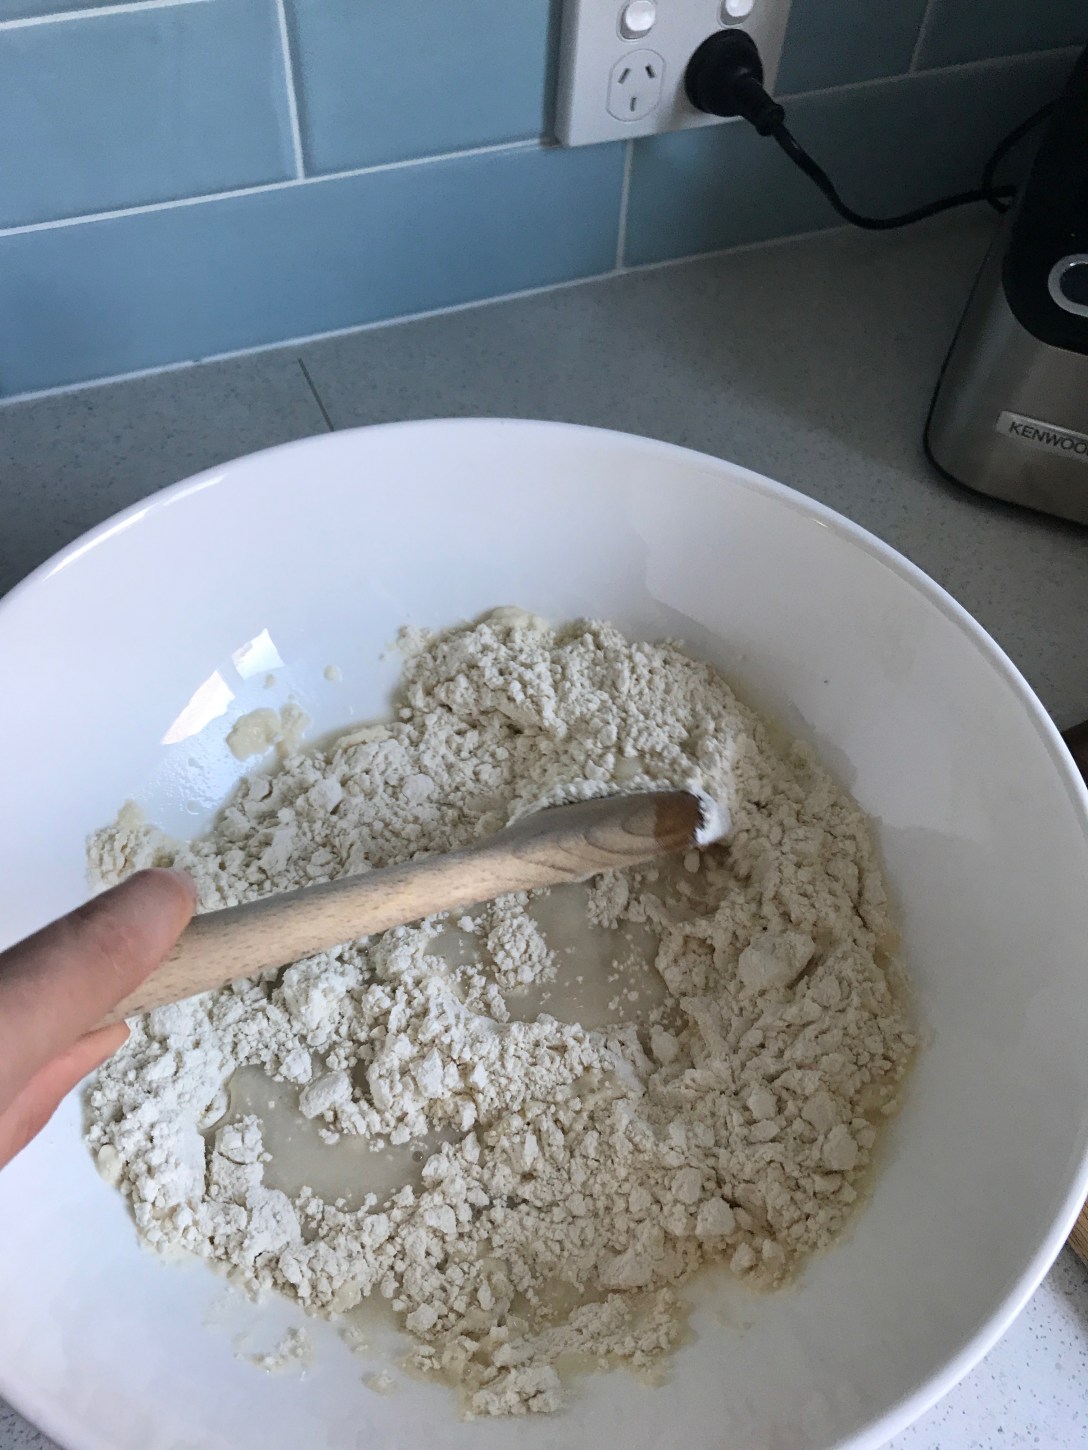
This recipe requires you to make a bread starter before getting stuck into the main dough (are these the exact right terms? Who knows). The bread starter contains yeast, water and flour. Ottolenghi calls for ‘lukewarm bottled spring water’. To that I say WHAT THE ACTUAL. I substituted the much more readily available and less insane ‘lukewarm water from the spring of my tap’. The yeast measurements allow for ‘active instant yeast’ and ‘fresh’. I wasn’t sure exactly what my sachets qualified as but followed the measurements for ‘active instant’. I mixed my somewhat substituted ingredients together and felt confident-ish that they were ‘porridge-like’ in consistency as described. Time for a two hour prove.
Around that time I looked more closely at the toppings the recipe suggested. They had three options to finish the focaccia with and I had already been to the supermarket and picked up rosemary and feta, confident these were listed. They were not. Instead there was parsley and olive, red onion and goat’s cheese, and red grape and fennel. I got a tiny bit nervous. Luckily, I had hours of dough proving ahead of me, so it was feasible to meander up to the shops and get olives (I felt like I could manage substituting parsley – not my favourite – for rosemary). Instead, I spent the first prove doing yoga (admirable! admire me!) and the second prove watching Riverdale (barely admittable!) and the third prove turned out to require quite a lot of hands on pushing of the dough so no olive purchasing was possible. I did manage to read a different focaccia recipe (Annabel Langbein) during this time and that one called for a single 30 minute prove. I had plenty of time to wonder if I’d made a huge mistake by starting off with a recipe from Yotam “time for another prove” Ottolenghi…
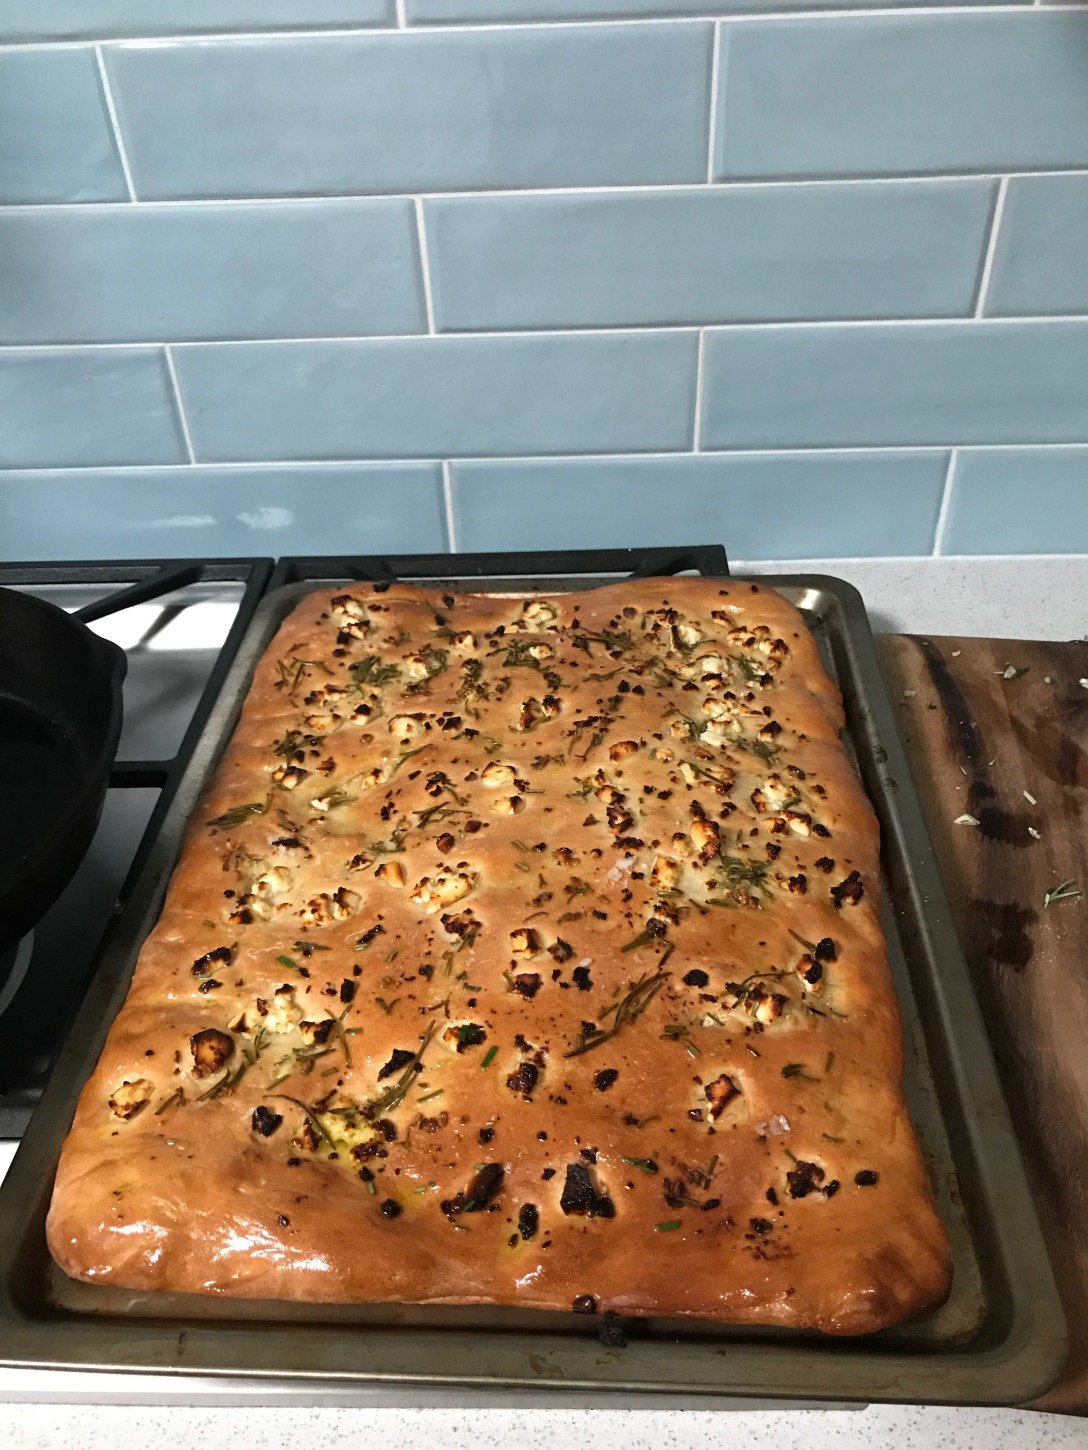
 The good news (and believe me I was more shocked than you could possibly be) is that the bread turned out amazingly. Amazingly enough that I suspect the results couldn’t be replicated with Annabel Langbein’s shortcut version. Even though I’d audaciously substituted the bottled water and dared to dream big with my toppings, the end result was beautiful and crunchy on the outside with a perfect texture inside and plenty of salty deliciousness on top. The house also smells so damn good. I actually think I would make it again, especially if I had some Meredith goat’s cheese around, as the flavoured oil in those jars could be used to great effect here also.
So, if you have five hours free and want a fragrant house, try this recipe! (Or buy a home fragrance or some flowers or order food in. There are lots of ways you can get a fragrant house in five hours).
Feta and Rosemary Focaccia
From Yotam Ottolenghi’s Ottolenghi, modified as slightly as possible
STARTER
1 1/2 tsp active dried yeast (or 15g fresh yeast)
420ml lukewarm water
330g bread flour
BREAD PROPER
330g bread flour
1 tbsp soft light brown sugar
2 tbsp olive oil (use the good stuff) + extra for brushing
1 tbsp flaky sea salt
TOPPING
100 g feta
3 sprigs rosemary, leaves picked and chopped
3 tbsp olive oil
1 clove garlic, crushed
flaky sea salt
Make the starter first: mix the yeast and water together in a large bowl with a wooden spoon so the yeast dissolves. Add the flour and stir until you have a porridge-like consistency, then cover with a damp cloth and leave to prove in a warm place for two hours (at which time it should have doubled in size).
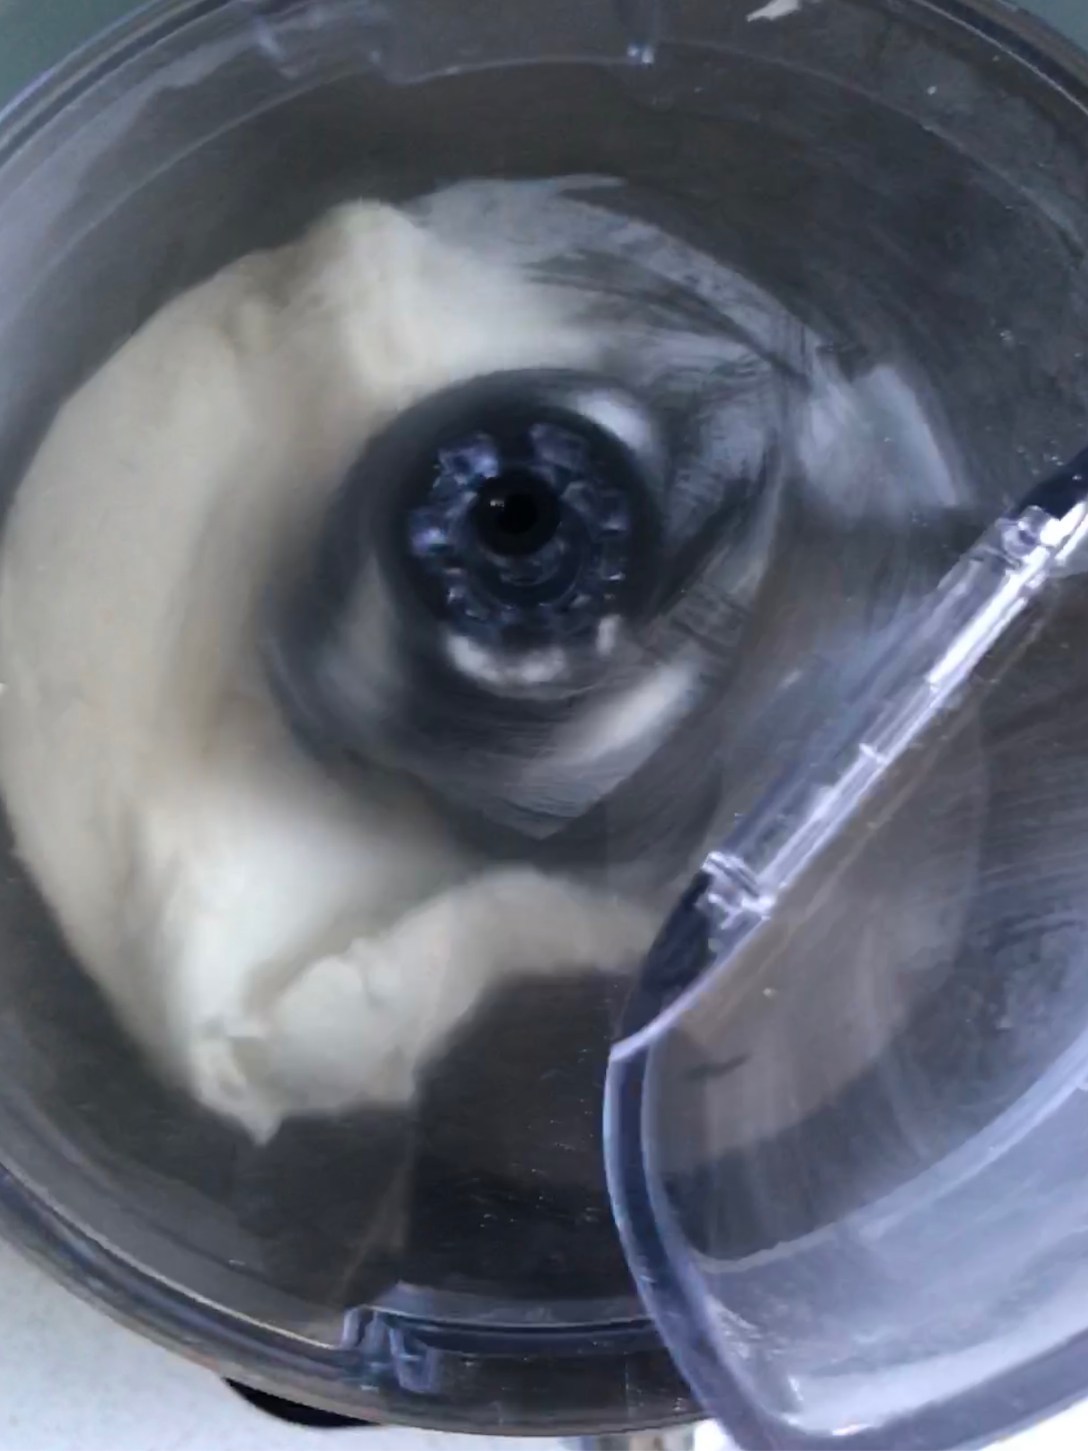
In the bowl of a mixer fitted with a dough hook combine the starter with the rest of the flour, oil and sugar and knead on a low speed for 6 minutes. Then add the salt and mix on a high speed for a further two minutes.
Turn the dough out into a large oiled bowl (I repurposed my one from the first prove). I thought the dough was insanely sticky at this stage, but it seemed to sort itself out. Brush the top of the dough with more oil, cover with the damp cloth again, and leave it to prove in a warm place for another hour (another doubling in size).
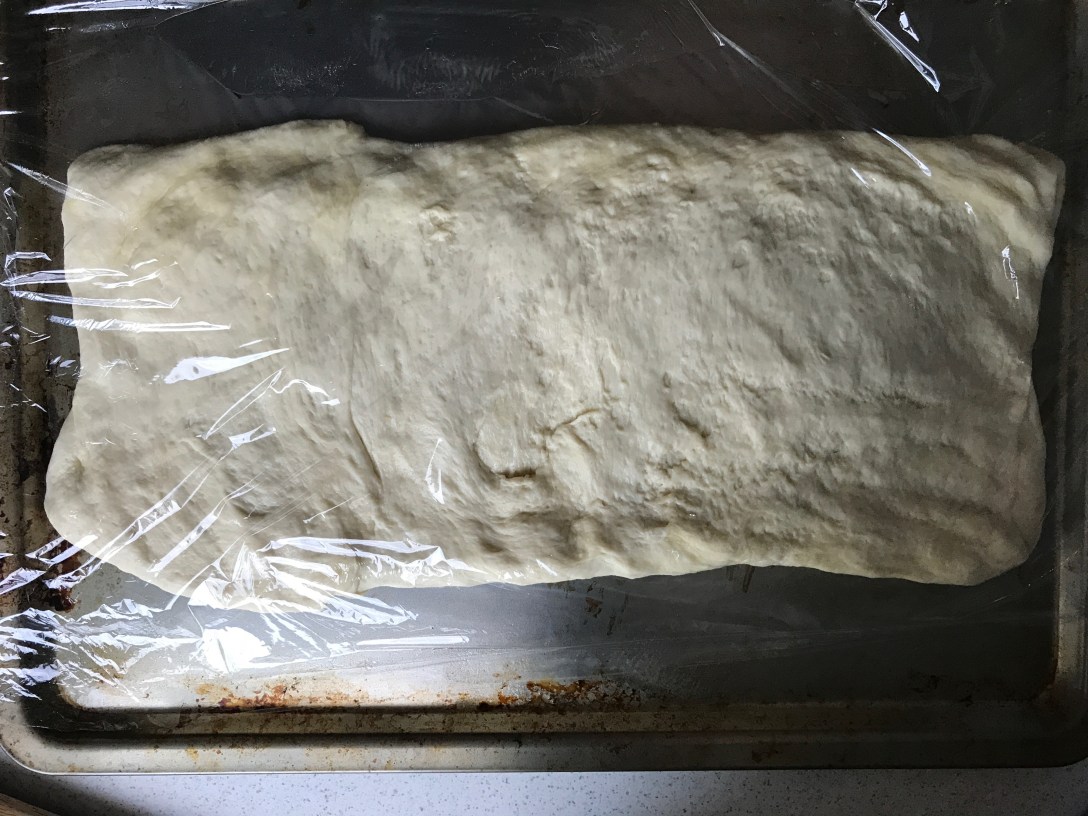
Prepare a heavy oven tray by brushing it with oil (roughly 30cm x 40cm, which is the biggest my oven allows). Turn the proved dough out onto a lightly floured surface and press into a large rectangle without working the dough too much. This sort of instruction always makes me a little jumpy, but mushing it into a rectangle was easy. Then fold one of the short sides into the middle and then fold the other short side over it (fold the whole rectangle into thirds). Flip your three-layered dough stack over so the crease is on the bottom and then pop it onto your tray and press it down towards the corners of the tray with your finders. I couldn’t get it to reach them initially, as you can see in the picture above, but as it proved it did. Now you cover it with cling wrap and leave for yet another hour. 3-4 times during this you need to check on it and give it some more gentle finger tip prodding to extend it to the edge of your tray. By the end of this prove the bread should cover the whole tray in a layer about 2cm thick and have lots of little bumps and hills in it (which means, hooray, no need to worry about it being wildly uneven…that’s part of the charm!)
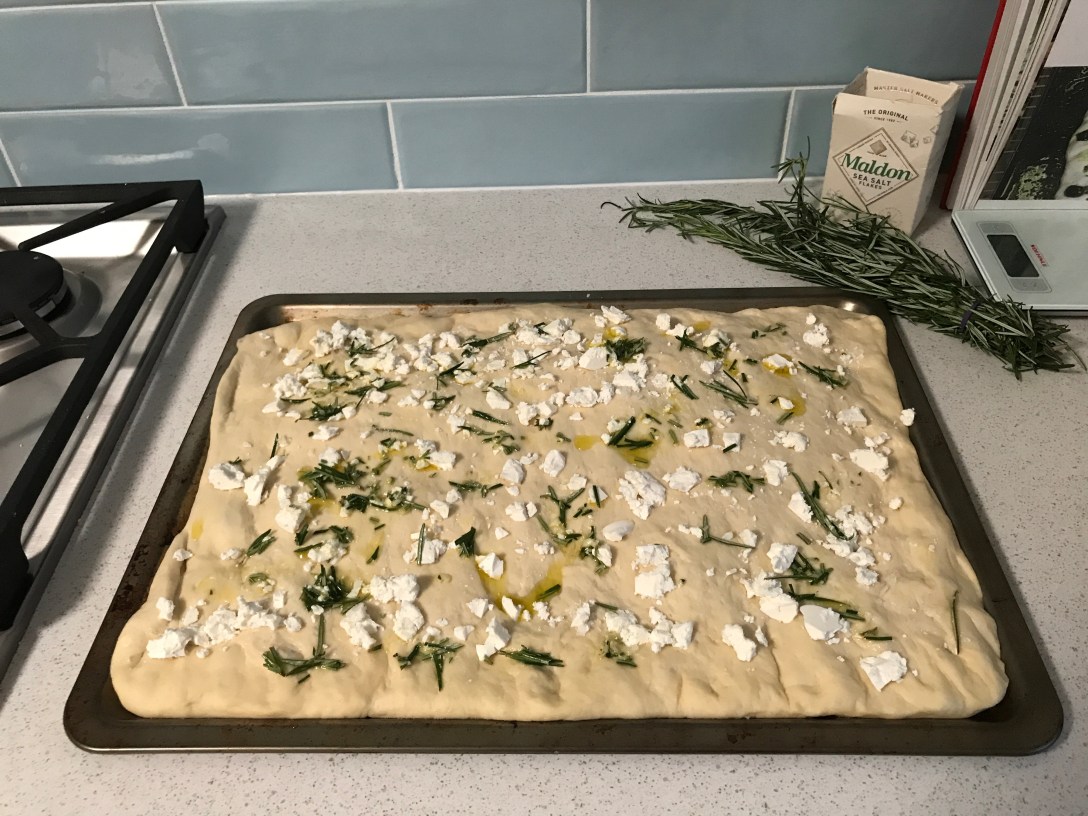
Preheat your oven to 240°C/220°C fan and prepare your topping. In this case that meant combining the rosemary, garlic and oil together and crumbling the cheese. I wasn’t, but you could definitely be creative here in terms of what goes on top – olives would obviously be fantastic, as would the grapes and fennel or the red onion and goats cheese. Pop your toppings on the bread – blob the oil mixture on and crumble the cheese over. Then put it into the oven for 10 minutes. Turn the temperature down to 210°C/190°C fan and cook for another 15-20 minutes. Check underneath the bread to make sure it’s nice and brown before declaring it done, and then brush the hot bread with a nice final coat of olive oil.
Keeps for 3 days and can be freshened up with a bit of heat and another lick of olive oil. Even though I’m home alone and the bread is quite vast, it might not keep for 3 days…

That looks like it turned out fantastic.
LikeLike