
Yes, I’ve cheated again. Lavoush is a fancy cracker to accompany cheese and dips and it does not require so much as a whiff of yeast to create. It doesn’t require much time either and it offers you the dual challenge/opportunity to really express yourself with toppings. Is it the perfect bread to make when you’re extremely pressed for time while planning a romantic weekend away for your partner’s birthday and intending to make a cheeseboard the centrepiece? Yes. Would it be a good thing to make in any other slightly less specific scenario? Also yes. 
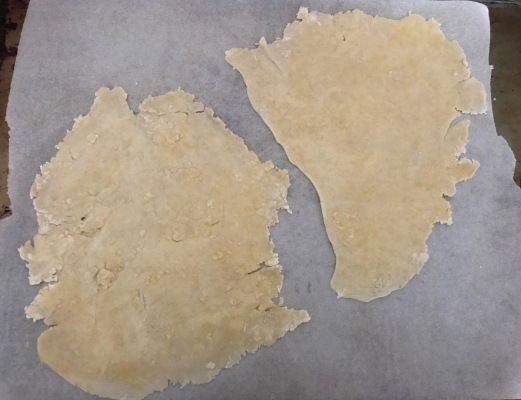
This came together in about half an hour over two nights. First you make the ‘dough’, which is just flour, a bit of butter, salt, sugar and water. Then you can ignore it for a day. Then you roll the dough into four thin sheets. I favoured the extremely rustic option of handrolling my four dough quarters into continental shapes, but you can be a show off and roll using a pasta machine and then trim the output down into something more orderly.

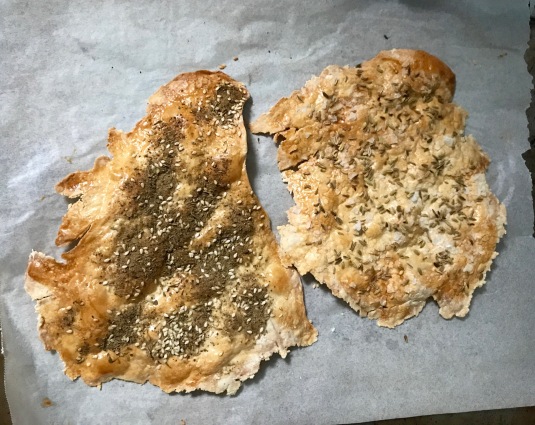
Finally, you brush the sheets with an eggwash and top with your creatively chosen toppings and then you bake. I’ve literally explained the whole recipe in a couple of paragraphs, it’s that easy.
Ok, there is one more step. You can then proceed to add them to a fantastic cheeseboard and serve in front of a roaring fire to exclamations of ‘god you’re amazing’ and expressions of genuine adoration.
Please also observe the other carbohydrate accompaniment on this platter. It’s the infamous Tivoli Road Olive Sourdough, which I am still feeling much too amateur to attempt. It remains the best bread in the world.
Lavoush
From old favourite Honey
INGREDIENTS
180g strong white flour
14g soft butter
a pinch of sugar
¼ tsp salt
60-80 ml water
1 egg for brushing
Your choice of topping (e.g. fennel seeds, chili flakes, za’atar, sea salt, sesame seeds, crushed nuts etc.)
METHOD
Mix flour, butter, sugar and salt together. Add water gradually until a really heavy, dry dough forms. It should just come together but not be soft or subtle at all. Smush into a ball and wrap in cling film. Refrigerate for at least an hour and up to two days.
Pre-heat your oven to 190°C/170°C Fan.
Remove cling film and divide dough into four pieces. On a clean surface, roll each piece as thinly as possible. You may need a touch more flour on your rolling pin if the dough is sticking. Again, if you want to be fancy you can use a pasta machine and you can also trim the rolled dough into neat squares if that suits your purposes.
Lift each piece of dough carefully and lay on a baking tray lined with baking paper. If your trays are all deep then flip them over and use them upside down and this ensures a better bake. Brush the top of the dough with some beaten egg and sprinkle with the topping of your choice.
Bake for 10-12 minutes (mine took more like 15), until the bread turns golden. Remove to a cooling rack to crisp up and once they are cold you can move them to a sealed container. I made mine on Thursday and they’re still good on Sunday, so they definitely have at least three days of shelf life.
