
The real blog is back! After three fabulous weeks pretending that I am a travel writer and not a middling home baker it is time to return to bread-making reality. Before I launch into this week’s masterpiece – raisin toast – I need to provide a few updates.
- On the subject of Pides.
During my pide post I complained about not knowing how pides should taste and therefore questioning whether my rock hard mince boats were in fact perfect and just not to my personal preferences. Since then we have discovered a great Turkish place on Uber Eats and have enjoyed some actuals pides. I can confirm that they do not, in any way shape or form, taste like rock hard mince boats. They are soft and pillowy and delicious and I committed an egregious crime with the pides I created and served to friends back in January. - On the subject of the Sourdough starter.
Sometimes, despite my best efforts, I am not as good at caring for things as I want to be. This has certainly been true of plants and phones and jewellery and clothes, and I certainly hope it won’t be true in the event I ever have a child. What I’m trying to tell you is that I killed my Sourdough starter through a combination of laziness, neglect and resentment. I haven’t permitted myself to make a new one yet, but I know I eventually will and I am somewhat dreading it.
So, with those admissions out of the way, I can share this week’s journey. Raisin Toast made the cut for no particularly great reason…perhaps I was amused by a bread that insists on being called ‘toast’ even before that is strictly accurate. I also needed a bread that would utilise our Japanese bread knife purchase, which ruled out some of the individual breads and pull-apart options I was looking at.
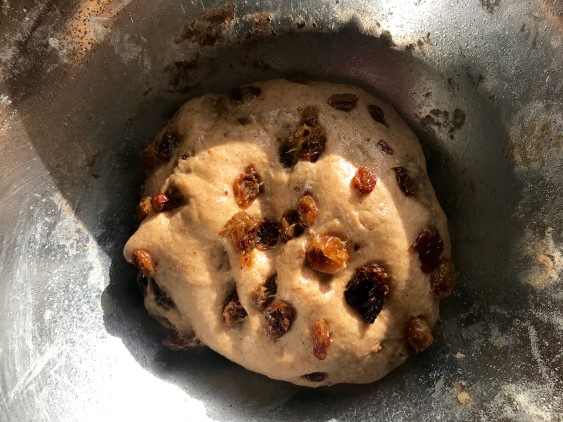
There were moments during this when shades of the Hot Cross Lumps appeared. The dough is cinnamon spiced and sticky fruit gets folded into it which is quite enough to cause chills. The kneading in general was lengthy, and I was very proud of myself for following the instructions to the letter (kneading for a full 15 minutes + resting time every 3 minutes) despite my corner-cutting subconscious wanting to declare the dough ‘smooth and elastic’ after about 2 minutes of work. See below for the very subtle progression.


The hard part came when the raisins involved themselves. They soak overnight to plump them up, but what appeared to happen was that some plumped and others got sticky and still others refused to interact with the water at all. The recipe called for carefully folding these into the dough and being sure not to smush the precious plumped raisins. That’s hard. Too hard for me. I accepted that there would be numerous raisin casualties and also that my beautiful long-kneaded dough would become way wetter than I wanted. By this point I was assuring myself that, when the bread inevitably failed, at least the flavours would be there.


Proving also took forever. Melbourne autumn is far less conducive to speedy rises than Melbourne summer, apparently. I let the initial 45 minutes extend to an hour fifteen and then stuck more or less to the schedule. This wasn’t because the dough was rising with more enthusiasm, but because I realised I needed to get the bread finished so I could stick to my own schedule for the day.
Anyway, that’s enough drawing it out to make this sound dramatic…the bread worked out just fine.


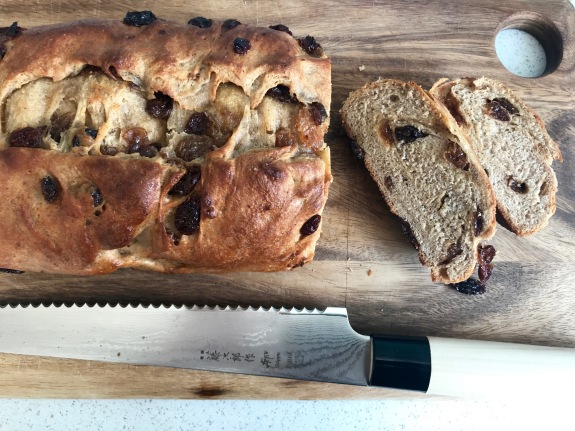
It wasn’t as tall and loaf-like as the picture in Dean Brettschneider’s book, but I have decided to blame my loaf tin for that. It is also possibly a touch dense, but when toasted and slathered with butter it is far too delicious to complain about.
Also, in the dying gasp of this post, I’m going to call this bread a Mother’s Day recipe and dedicate it to my own mother. If she were here this is absolutely not something she would have requested, but I’m sure she’d be polite about it while wishing I’d made her scrambled eggs with no bread instead. Love you.
Raisin Toast/Bread
From Dean Brettschneider’s simply titled ‘BREAD’
Prep time: 25-30 minutes
Proving time: at least 2 hours 15 minutes
Baking time: 25 minutes
INGREDIENTS
For Dough
150g (1C) raisins
300g (2C) strong bread flour
5g (1 tsp) salt
25g (2 tbsp) butter – Dean doesn’t specify but I used softened butter for this
25g (2 tbsp) sugar
7g (2½ tsp) yeast – aka one sachet
10g (1 tbsp) ground cinnamon
1 small egg (or large. I used large)
150ml (2/3C) water
40g (3 tbsp) cold butter, cut into 4x 5mm cubes (I used less butter and still had 6 cubes, Dean’s math doesn’t seem quite right to me)
30g (2 tbsp) melted butter, for glazing loaf after baking
METHOD
The night before, toss the raisins in 50ml hot water and leave to soak.
The next day place all of the dough ingredients (except for the raisins) into a large mixing bowl. Using a wooden spoon, mix to form a dough. Tip out your shaggy mess onto a lightly floured surface and knead for 15 minutes. Every 2-3 minutes, take a break and let the dough rest for 1 minute. According to my understanding of this instruction, the process will take 20 minutes – for every 3 minutes of kneading you have 1 minute of resting. Dean cautions that the dough may be excessively sticky at the start and to avoid adding additional flour (see: Hot Cross Lumps for how that can go), but I found that the dough was pretty easy to work with.
Once you’ve kneaded for 15 minutes it’s time for the tricky bit – adding the raisins. Incorporate them and continue to knead very gently, trying to both add them into the dough and avoid smushing them. It’s not easy.
Lightly oil a large bowl (e.g. the one you just used to mix the dough) and place the dough back in there, cover with clingfilm and leave to prove in a warm place for 45 minutes (or until doubled).
Gently knock the dough back – Dean recommends folding it onto itself. Re-cover with the plastic wrap and leave for another 30 minutes. This step helps the dough develop strength, even though it feels like you’re undoing the hard work of the first rise.
Grease a 500g loaf tin.
Tip the dough out onto a lightly floured work surface. Shape into a large flat rectangle and then roll dough up tightly from one side. The dough will be like a tight swiss roll. Place the dough into the oiled tin, seam side down. Cover with plastic wrap (reuse the one from the bowl!) and leave to prove for another hour.
Preheat your oven to 200°C/180°C Fan.
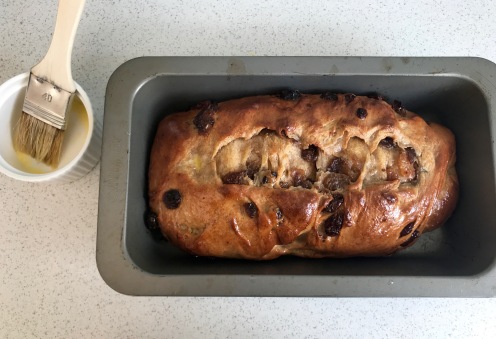
Using a sharp knife or razor blade, make a 5mm deep cut straight down the centre of the loaf and place your cold knobs of butter down the length of the cut. Place the tin in the preheated oven and quickly close the door.
Bake for 20-25 minutes (I needed nearly 30 at 180°C Fan), until a nice golden brown colour. I also tested the inside for doneness – an internal temperature of more than 95°C/200°F.
Remove loaf from oven and brush the surface immediately with melted butter.
When cool, cut into thick slices and toast. We also ate a couple of slices warm out of the oven (UNTOASTED. SCANDAL) and they were quite sensational.

i truly admire your commitment to kneading! – i have never seen the lumps of butter theng before – could you tell what effect it had?
LikeLike
Me either! I actually don’t know and I also don’t really know if I did it right…it seems odd to do that and to brush it with butter right afterwards? I should try it without and see if it makes any difference…
LikeLike
Loved the recipe
LikeLike